Developers building applications on top of the Google App Engine for Java can choose between several frameworks to build rich user interfaces. This post illustrates how to create a simple CRUD application, using DHTMLX Java Tag Library and JPA. The sample provided starts by creating a UI skeleton, which incorporates the DHTMLX widgets, with the use of JavaScript, to integrate the widgets with server side code.
The User Interface

The application major features are:
- Dynamic Loading
Keeping thousand of records in a data grid is a common requirement for most applications. Smart Rendering increases overall performance with big amounts of data, activating a dynamic loading to fetch data from the server when needed.
- Edit in place
In the great book Designing Web Interface, written by Bill Scott and Theresa Neil, they underline the value of the Make It Direct principle, allowing the user to directly edit content in place.
- Right Click Context Menu
The Fitts's Law highlights the value to keep the tools close, to improve the user interaction. This principle has been applied providing a context menu, so that the user can select a row and access the related functions (delete and insert in this case) using the right click.
Client
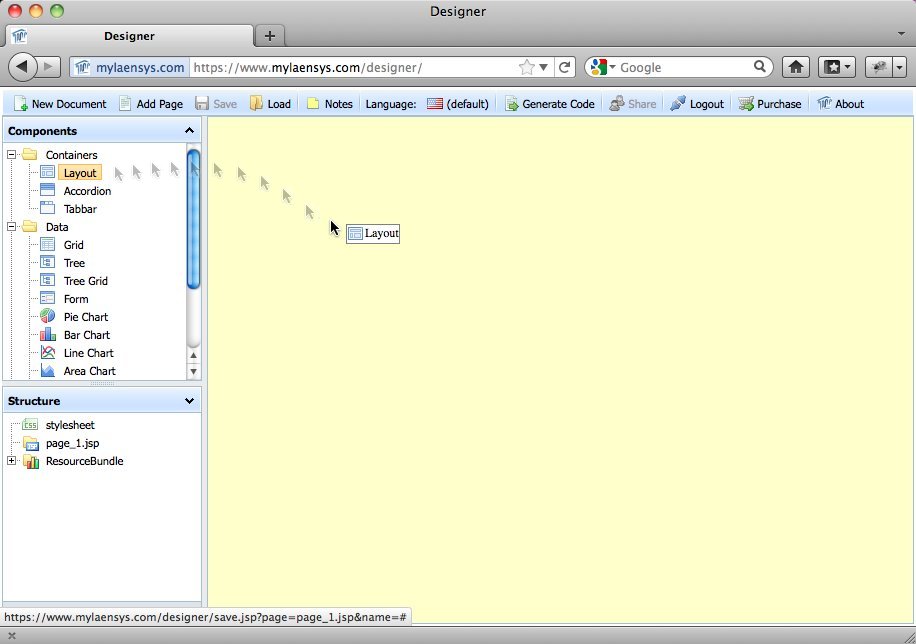
To create the user interface the DHTMLX Java Tag Designer has been used (useful but not mandatory). You can find step by step instructions here. Below the HTML code of the page.
The user interface is declared within the <dhtmlx:body> tags, using a Layout component as container for the Toolbar, Status Bar, and Grid.
Server
The doGet method of the servlet retrieves the data and feeds the grid.
- <%@ taglib uri="http://www.mylaensys.com/dhtmlx" prefix="dhtmlx" %>
- <html>
- <head>
- <meta http-equiv="Content-Type" content="text/html;charset=UTF-8"/>
- <title></title>
- <link href="dhtmlx.css" rel="stylesheet" type="text/css" />
- <link href="dhtmlx_custom.css" rel="stylesheet" type="text/css" />
- <style></style>
- </head>
- <script type="text/javascript" src="dhtmlx.js"/>
- <body>
- <!-- body -->
- </body>
- </html>
- <dhtmlx:body name='initializeDHTMLX' imagePath='imgs/'>
- <dhtmlx:layout name='layout' id='content' pattern='1C' >
- <dhtmlx:layoutcell name='a' text='a' hideHeader='true'>
- <dhtmlx:toolbar name='toolbar'>
- <dhtmlx:toolbarButton id='button_ins' text='Insert Row'/>
- <dhtmlx:toolbarButton id='button_del' text='Delete Row'/>
- </dhtmlx:toolbar>
- <dhtmlx:grid name='grid'>
- <dhtmlx:column name='sales' header='Sales' type='ed'/>
- <dhtmlx:column name='title' header='Title' type='ed'/>
- <dhtmlx:column name='author' header='Author' type='ed'/>
- <dhtmlx:column name='price' header='Price' type='ed'/>
- <dhtmlx:menu name='grid_menu'>
- <dhtmlx:menuChild id='button_ins' text='Insert Row'/>
- <dhtmlx:menuChild id='button_del' text='Delete Row'/>
- </dhtmlx:menu >
- </dhtmlx:grid>
- <dhtmlx:statusbar name="status"/>
- </dhtmlx:layoutcell>
- </dhtmlx:layout>
- </dhtmlx:body>
- <script language='JavaScript' type='text/javascript'>
- function initialize() {
- initializeDHTMLX();
- }
- dhtmlxEvent(window,'load', initialize);
- </script>
The user interface is declared within the <dhtmlx:body> tags, using a Layout component as container for the Toolbar, Status Bar, and Grid.
- var busy = false,sort_c = "",sort_d = "";
- function initialize() {
- initializeDHTMLX();
- toolbar.attachEvent("onClick", on_click );
- grid_menu.attachEvent("onClick", on_click );
- grid.attachEvent("onBeforeSorting", function(ind,type,direction){
- if(!busy) {
- sort_c = this.getColumnId(ind);
- sort_d = ((sort_d == "des") ? "asc": "des");
- load_data();
- grid.setSortImgState(true,ind,direction);
- }
- return false;
- });
- grid.enableSmartRendering(true);
- grid.enableValidation(true, true, true, true);
- grid.setColValidators("ValidInteger,NotEmpty,NotEmpty,ValidInteger");
- load_data();
- dp = new dataProcessor("controller");
- dp.setTransactionMode("POST");
- dp.setUpdateMode("cell");
- dp.enableDataNames(true);
- dp.init(grid);
- }
In first step, the event handlers for toolbar and menu are attached to the components. The initialization proceed with the grid setup, enabling the SmartRendering, setting up the validation, and loading the data. OnBeforeSorting event handler attached to the grid provides the support for server side sort processing.
Last step of initialization, is the data processor configuration, which takes care to send back to the server updates that occurred on the grid; calling enableDataNames ensures that the column names will be included as parameters in the POST request.
The two additional functions defined for toolbar/menu command handling (on_click) and data loading (load_data) are visible below :
- function load_data() {
- if( !busy ) {
- grid.clearAll();
- grid.loadXML("controller?orderby="+sort_c+"&dir="+sort_d);
- }
- }
- function on_click(id) {
- var selected = grid.getSelectedRowId();
- if( null != selected) {
- if( "button_ins" == id ) {
- grid.addRow((new Date()).valueOf(),[0,'','',0],grid.getRowIndex(selected));
- } else if( "button_del" == id ) {
- var answer = confirm("Are you sure ?")
- if (answer){
- grid.deleteRow(selected);
- }
- }
- }
- }
The load_data function resets the grid component and sends an ajax request (GET) to the server to retrieve the data. The on_click detects which button or menu item has been selected by the user and performs the corresponding operation.
Server
On the server side, the Java class Book is annotated for persistence, getter and setter omitted for short. You can see that the names of the attributes match the names of the columns.
- @PersistenceCapable(detachable = "true")
- public class Book {
- @PrimaryKey
- @Persistent(valueStrategy = IdGeneratorStrategy.IDENTITY)
- private Long id;
- @Persistent
- private Integer sales;
- @Persistent
- private String title;
- @Persistent
- private String author;
- @Persistent
- private BigDecimal price;
- }
The doGet method of the servlet retrieves the data and feeds the grid.
- public class ControllerServlet extends HttpServlet {
- @Override
- public void doGet(HttpServletRequest request,
HttpServletResponse response) throws IOException { - EntityManager em = EMF.get().createEntityManager();
- try {
- Integer start = new Integer(0);
- Integer count = new Integer(maxrows);
- Integer total = new Integer(0);
- if (!isEmpty(request.getParameter("posStart"))) {
- start = Integer.parseInt(request.getParameter("posStart"));
- }
- if (!isEmpty(request.getParameter("count"))) {
- count = Integer.parseInt(request.getParameter("count"));
- count = count > maxrows ? maxrows : count;
- }
- if (start.intValue() == 0) {
- Query query = em.createQuery("select count(b) from " +
Book.class.getName() + " b"); - total = (Integer) query.getSingleResult();
- }
- String orderBy = getOrderBy(
request.getParameter("orderby"), request.getParameter("dir")
); - Query query = em.createQuery("select from " +
Book.class.getName() + orderBy ); - query.setFirstResult(start);
- query.setMaxResults(count);
- List<Book> books = query.getResultList();
- response.setContentType("text/xml");
- response.getWriter().print( toXML(total, start, books) );
- response.getWriter().close();
- } finally {
- em.close();
- }
- }
- }
- }
The smart rendering option, enabled during grid initialization, adds as parameters the starting position of the record (posStart) and the number of records to be returned (count). The doGet method processes these parameters plus sort parameters, if any, executes the query on the data store, and returns the retrieved rows as XML.
Update operations are performed in the doPost method of the ControllerServlet :
- public class ControllerServlet extends HttpServlet {
- @Override
- protected void doPost(HttpServletRequest request,
HttpServletResponse response) - EntityManager em = EMF.get().createEntityManager();
- try {
- String action = "";
- String id = request.getParameter("gr_id");
- String type = request.getParameter("!nativeeditor_status");
- Book book = new Book();
- if ("inserted".equalsIgnoreCase(type)) {
- action = "insert";
- BeanUtils.populate(book, request.getParameterMap());
- em.persist(book);
- em.refresh(book);
- } else {
- Query query = em.createQuery("select from " + Book.class.getName()
+ " where id = " + id); - book = (Book) query.getSingleResult();
- if ("updated".equalsIgnoreCase(type)) {
- action = "update";
- BeanUtils.populate(book, request.getParameterMap());
- em.persist(book);
- } else if ("deleted".equalsIgnoreCase(type)) {
- action = "delete";
- em.remove(book);
- }
- }
- if (!isEmpty(action)) {
- response.setContentType("text/xml");
- response.getWriter().print("<data><action type='" + action + "' sid='" + id + "' tid='" + book.getId() + "' /></data>");
- response.getWriter().close();
- }
- } catch (Exception e) {
- e.printStackTrace();
- } finally {
- em.close();
- }
- }
DHTMLX data processor component has its own protocol to exchange information with the server (additional information is available on DHTMLX website). This sample implementation, detects the operation triggered by the data processor and performs the appropriate data store operation.
It was a good tip! This is very helpful to increase my knowledge and Thanks for giving the valid post.
ReplyDeleteExcel Training in Chennai
Advanced Excel Training in Chennai
corporate training in chennai
Tableau Training in Chennai
Pega Training in Chennai
Spark Training in Chennai
Embedded System Course Chennai
Linux Training in Chennai
Excel Training in Chennai
Advanced Excel Training in Chennai
Fabulous post. Irrespective of the age groups your post is liked by all. Thanks for sharing.
ReplyDeleteSpoken English Class in Chennai
IELTS Coaching Centre in Chennai
English Speaking Course in Mumbai
IELTS Classes in Mumbai
IELTS Coaching in Mumbai
IELTS Mumbai
Best IELTS Coaching in Mumbai
IELTS Center in Mumbai
weighing machine for kitchen
ReplyDeleteThanks to the admin you have spend a lot for this blog I gained some useful info for you. Keep doing. web design company in velachery
ReplyDelete
ReplyDeleteGet inspired by your blog. Keep doing like this....
Selenium Training in Chennai
Selenium Training in Bangalore
Selenium Training in Coimbatore
Best Selenium Training in Bangalore
Selenium Training Institute in Bangalore
Selenium Classes in Bangalore
selenium training in marathahalli
Selenium training in Btm
Ielts coaching in bangalore
German classes in bangalore
It's a very awesome article! Thanks a lot for sharing information.
ReplyDeleteSelenium Training Institute in Bangalore
Best Selenium Training Institute in Bangalore
python course in hyderabad
Software Testing Course in Chennai
best angularjs training in bangalore
web designing training institute in chennai
python training in marathahalli
Software Testing Training in Bangalore
Angularjs Training in hyderabad
Hadoop Training in Coimbatore
Your post is really good. it is really helpful for me to improve my knowledge in a right way..
ReplyDeleteDOT NET Training in Bangalore
Dot NET Training in Marathahalli
DOT NET Training Institute in Marathahalli
DOT NET Training Institutes in Bangalore
DevOps Training in Bangalore
PHP Training in Bangalore
.Net training in chennai
dot net course in coimbatore
.net training in coimbatore
DOT NET Course in Chennai
The blog you shared is very good. I expect more information from you like this blog. Thank you.
ReplyDeletemvc training in chennai
mvc course in chennai
mvc chennai
mvc classes in chennai
google cloud certification training in chennai
mysql training in Chennai
Leadership Training in chennai
matlab Training in Chennai
Nice article. I liked very much. All the informations given by you are really helpful for my research. keep on posting your views.
ReplyDeleteGerman Classes in Chennai | Certification | Language Learning Online Courses | GRE Coaching Classes in Chennai | Certification | Language Learning Online Courses | TOEFL Coaching in Chennai | Certification | Language Learning Online Courses | Spoken English Classes in Chennai | Certification | Communication Skills Training
Such a wonderful blog, I got new information from this article.
ReplyDeleteios mobile application development
ios apps development
hadoop technologies
importance of cloud computing
what is cloud in cloud computing
node js advanced interview questions
Amazing website, Love it. Great work done.
ReplyDeletewww.office.com/setup
Aivivu chuyên vé máy bay, tham khảo
ReplyDeletegiá vé máy bay đi Mỹ khứ hồi
bay từ mỹ về việt nam
vé máy bay việt nhật vietnam airline
thuê xe đi sân bay nội bài
If you encounter an issue that Orbi parental controls don’t support, then it is advisable to reset the Netgear router. Apart from this, you might accidentally change some files that might cause an error. In such a situation, it is advisable to reset the Orbi router in your home.
ReplyDeleteThank you so much for sharing such an intresting blog with us.
ReplyDeleteThanks for sharing informative post. Are looking for best Tamil typing tool online, make use of our Tamil typing software to make translation faster. Thirumana Porutham in Tamil | Samacheer Kalvi Books PDF
ReplyDeleteIncredible post I should say and a debt of gratitude is in order for the data. Schooling is certainly a tacky subject. Be that as it may, is still among the main subjects within recent memory. I appreciate your post and anticipate more. You have made some valid statements there. I looked on the web to study the issue and discovered a great many people will oblige your perspectives on this site...
ReplyDeletehow to make a paper airplane eagle | how to make a boomerang airplane | the eagle paper airplane | best paper airplane design for distance and accuracy | best paper airplanes for distance and speed
Amazing blog very interesting thanks for the post...Sai satcharitra pdf
ReplyDeleteSai Satcharitra Telugu Pdf
Sai Satcharitra Tamil Pdf
Sai Satcharitra Hindi Pdf
Sai Satcharitra Bengali Pdf
burdur
ReplyDeletebursa
çanakkale
çankırı
çorum
denizli
diyarbakır
GOZ
aydın
ReplyDeletebalıkesir
bayburt
bilecik
bolu
DDLF
van
ReplyDeletekastamonu
elazığ
tokat
sakarya
İEX
tekirdağ evden eve nakliyat
ReplyDeleteşırnak evden eve nakliyat
bitlis evden eve nakliyat
aksaray evden eve nakliyat
karaman evden eve nakliyat
3CLK
36766
ReplyDeletemexc
ısırgan sabunu
poloniex
bitcoin hangi bankalarda var
4g mobil proxy
en iyi kripto para uygulaması
mexc
btcturk
en eski kripto borsası
2293D
ReplyDeletekredi kartı ile kripto para alma
kucoin
binance referans kod
mexc
bitcoin nasıl kazanılır
paribu
binance 100 dolar
telegram türk kripto kanalları
referans kod
D9EF9
ReplyDeletebitcoin nasıl kazanılır
July 2024 Calendar
February 2024 Calendar
papaya meyvesi
telegram kripto kanalları
bitexen
mexc
paribu
sohbet canlı
BAE96
ReplyDeleteÇamlıdere
Toprakkale
Çanakkale
Süleymanpaşa
Kiraz
Sarıcakaya
Suruç
Doğanşar
Kozlu
47367
ReplyDeletekripto paralar
vds satın al
ehliyet soruları çöz
sunucu
gal coin yorum
facebook reklam verme
bat coin yorum
facebook para kazanma
rad coin yorum
1C891
ReplyDelete----
----
----
----
----
matadorbet
----
----
----
16252
ReplyDeletewhatsapp görüntülü şov
686D6
ReplyDeletewhatsapp görüntülü show güvenilir
EF7A1A989F
ReplyDeletedelay
viga
whatsapp görüntülü show güvenilir
cobra vega
degra
canli cam show
görüntülü show
ücretli show
kamagra
AEF6437C78
ReplyDeletecanli cam show
novagra hap
görüntülü şov
themra macun
ücretli şov
vigrande
cialis
delay
sildegra
50AACD4C04
ReplyDeletemobil ödeme tiktok takipçi
59170BEFF0
ReplyDeletetürk takipçi twitter
082063B2F6
ReplyDeleteTelegram Mining Botları
Telegram Güvenilir Coin Kazanma Botları
Telegram Para Kazanma
Telegram Farm Botları
En İyi Telegram Mining Botları